PyroCMS is an open-source CMS based on PHP and Laravel web frameworks. It is a powerful content management system with MySQL/MariaDB as the database and also provides intuitive and simple web administration for easier management.
In this tutorial, we’ll walk you through the installation of PyroCMS on Ubuntu 24.04 with the LEMP Stack (Linux, Nginx, MySQL/MariaDB, and PHP-FPM) and Composer.
Prerequisites
Before you start, make sure you have the following:
- An Ubuntu 24.04 server.
- A non-root user with administrator privileges.
- A domain name pointed to the server IP address.
Installing dependencies
PyroCMS is a Laravel-based content management system with MySQL/MariaDB as the database. Before installing PyroCMS, you’ll install the LEMP Stack (Linux, Nginx, MySQL/MariaDB, and PHP-FPM) and Composer to your Ubuntu system.
First, run the following apt command to update your package index and install the LEMP Stack (Linux, Nginx, MySQL/MariaDB, and PHP-FPM) and Composer.
sudo apt update sudo apt install nginx mariadb-server composer php-cli php-fpm php-mysql php-curl php-sqlite3 php-mbstring php-gd php-xml
Input Y to confirm with the installation.
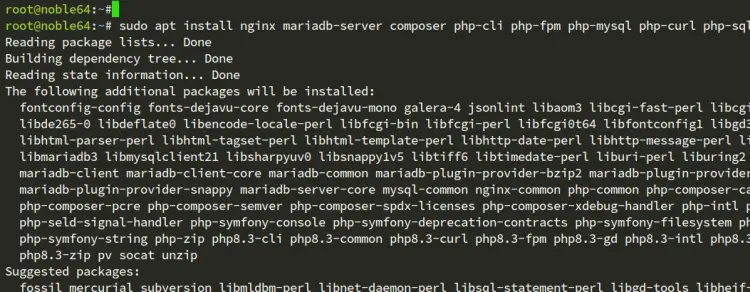
After the installation, check LEMP Stack services to ensure those services are running.
Check the Nginx web server with the systemctl command below.
sudo systemctl is-enabled nginx
sudo systemctl status nginx
Now check the MariaDB server status with the following:

sudo systemctl is-enabled mariadb
sudo systemctl status mariadb

Next, run the following command to check the PHP-FPM service.
sudo systemctl is-enabled php8.3-fpm
sudo systemctl status php8.3-fpm

Lastly, check the Composer version using the command below. You’ll see Composer 2.4.7 is installed.
sudo -u www-data composer --version

Configuring PHP-FPM
After you’ve installed dependencies, you’ll configure the PHP-FPM by changing some default configuration through the php.ini file and restarting the PHP-FPM service.
Open the php.ini file for PHP-FPM with the nano editor.
sudo nano /etc/php/8.3/fpm/php.ini
Change the default configuration with the following and adjust the date.timezone and memory_limit options with your current environment.
date.timezone = Europe/Amsterdam
max_execution_time = 130
memory_limit = 256M
allow_url_fopen = On
allow_url_include = Off
post_max_size = 128M
upload_max_filesize = 128M
max_input_vars = 5000
When finished, save the file and exit the editor.
Now run the systemctl command below to restart the PHP-FPM service and apply your changes on php.ini.
sudo systemctl restart php8.3-fpm
Configuring MariaDB server
Now that you’ve configured PHP-FPM, you’ll secure MariaDB server installation and create a new database and user for the PyroCMS.
Secure your MariaDB server installation with the mariadb-secure-installation command below.
sudo mariadb-secure-installation
You’ll be asked about the following configurations:
- Switch to unix_socket authentication? Input n and press ENTER.
- The default MariaDB root user is already protected. optionally, you can also enable it by typing y for yes.
- Change the root password. Input y to confirm and set up your new MariaDB root password.
- Remove anonymous users? Input y to confirm.
- Disallow root login remotely? Input y to confirm. Only local connection will be allowed if you are using the MariaDB
- Remove the test database and access it. Input y to confirm and remove the default database ‘test’.
- Lastly, input y again to reload all table privileges on your MariaDB server and apply new changes.
After you’ve configured MariaDB, you’ll create a new database and user for PyroCMS.
Log in to the MariaDB server with the mariadb command below. Enter your root password when prompted.
sudo mariadb -u root -p
Now run the following queries to create a new database pyrocmsdb, a new user pyrocms@localhost, and the password is passw0rd. Change details database name, username, and password as needed.
CREATE DATABASE pyrocmsdb;
GRANT ALL PRIVILEGES ON pyrocmsdb.* TO pyrocms@localhost IDENTIFIED BY 'passw0rd';
FLUSH PRIVILEGES;

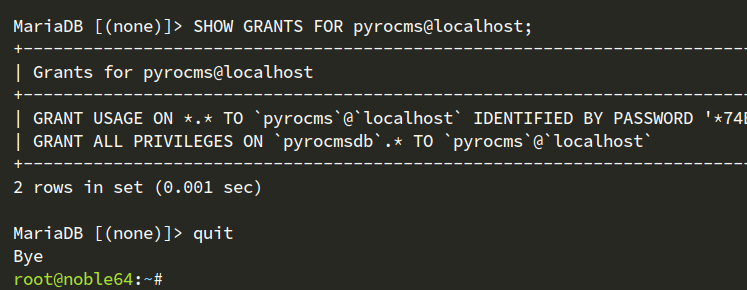
Next, run the query below to verify privileges for user pyrocms@localhost. You’ll see the pyrocmsdb database is accessible with the user pyrocms@localhost.
SHOW GRANTS FOR pyrocms@localhost;
Lastly, type quit to exit from the MariaDB server.
Downloading PyroCMS source code
Create new directories for Composer and PyroCMS, go to the /var/www/pyrocms, and then change ownership of new directories to the user www-data. In this case, the /var/www/pyrocms will be used as the document root for PyroCMS.
mkdir -p /var/www/{.config,.cache,pyrocms}; cd /var/www/pyrocms
sudo chown -R www-data:www-data /var/www/{.config,.cache,pyrocms}
Now run the composer command below to download the PyroCMS source code, and install and update PHP dependencies.
sudo -u www-data composer create-project pyrocms/pyrocms .
sudo -u www-data composer update
Below you can see the installation of PyroCMS through the composer command:
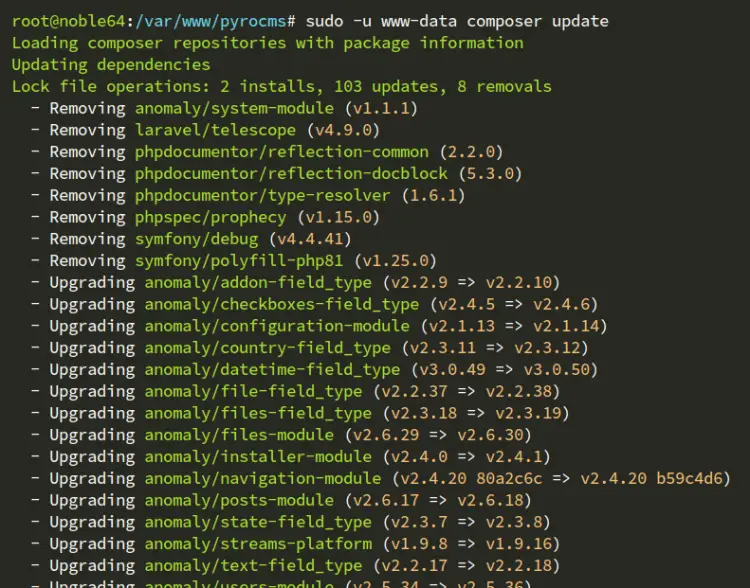
After the installation is complete, move to the next section.
Setting up Nginx server block
In this section, you’ll create a new Nginx server block configuration for PyroCMS installation. So make sure you have a domain name pointed to your Ubuntu server IP address. In this example, you’ll be using a domain name howtoforge.local.
Create a new Nginx server block /etc/nginx/sites-available/pyrocms.conf with the nano editor.
sudo nano /etc/nginx/sites-available/pyrocms.conf
Copy and paste the following configuration and make sure to change the server_name with your domain name.
server {
listen 80;
server_name howtoforge.local;index index.php index.html;
root /var/www/pyro/public;
location / {
try_files $uri $uri/ /index.php?$args;
}
location ~ \.php$ {
include fastcgi_params;
fastcgi_pass unix:/run/php/php-8.3-fpm.sock;
fastcgi_param SCRIPT_FILENAME $document_root$fastcgi_script_name;
fastcgi_index index.php;
}
}
When done, save and exit the file.
Now run the command below to create a symlink of the pyrocms.conf file to the /etc/nginx/sites-enabled directory and verify your Nginx syntax.
sudo ln -s /etc/nginx/sites-available/pyrocms.conf /etc/nginx/sites-enabled/
sudo nginx -t
If you’ve proper Nginx syntax, you’ll see an output test is successful – syntax is ok.

Lastly, run the following systemctl command to restart the Nginx web server and apply your changes.
sudo systemctl restart nginx
Securing PyroCMS with HTTPS through Letsencrypt
To secure PyroCMS, you’ll implement HTTPS through Letsencrypt. For that, you must install Certbot to generate SSL/TLS certificates and automatically implement HTTPS on your PyroCMS installation.
Install certbot and python3-certbot-nginx packages with the following command. Input Y to confirm the installation.
sudo apt install certbot python3-certbot-nginx
Now run the certbot command below to generate SSL certificates and secure PyroCMS with HTTPS.
sudo certbot --nginx --agree-tos --no-eff-email --redirect --hsts --staple-ocsp --email [email protected] -d howtoforge.local
After the process is finished, you’ll get your certificates on the /etc/letsencrypt/live/domain.com directory, and your PyroCMS is now secured with HTTPS.
Installing PyroCMS using the web installer
Open your web browser and visit your domain name such as Now you’ll see a single page of PyroCMS installation:
- Select I Agree to accept the license for PyroCMS installation.
- Input your database name, user, and password.
- Input new admin user, email address, and password for your PyroCMS.
- Input site details for your installation, such as domain name, language, and timezone.
- Click Install to confirm the installation.
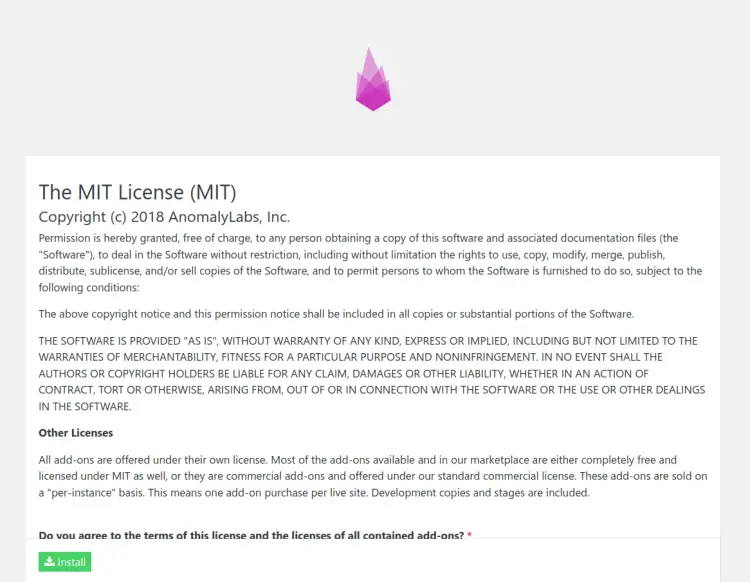
After the installation is complete, you’ll see the following page:

Click View Site to access the PyroCMS home page. Below you can see the default index page for PyroCMS.
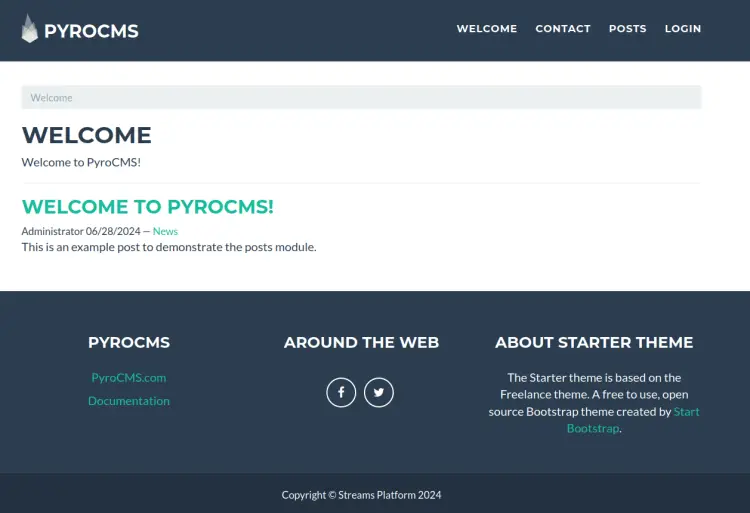
Click Login to access PyroCMS’s login screen. Input your admin user and password, and then click Login.

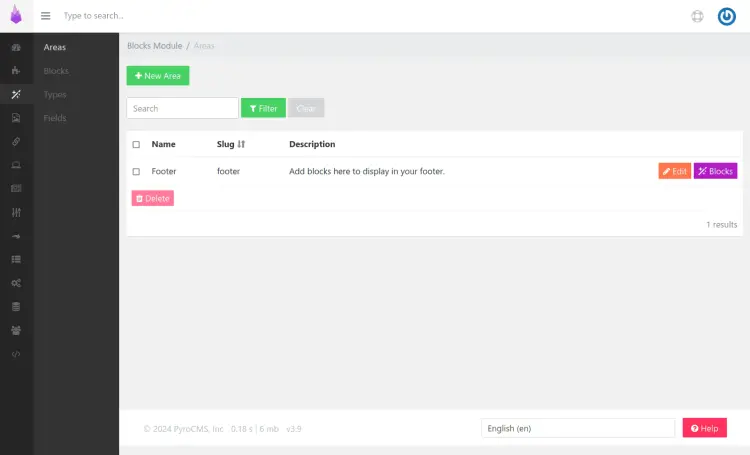
If successful, you’ll see the PyroCMS admin dashboard like the following:
Conclusion
Congratulations! You’ve completed the installation of PyroCMS on the Ubuntu 24.04 server. You have the PyroCMS installed with the LEMP Stack (Linux, Nginx, MySQL/MariaDB, and PHP-FPM). You’ve also downloaded PyroCMS with Composer and secured PyroCMS with HTTPS through Certbot and Letsencrypt.


