WP-CLI is a command-line interface for managing WordPress installations on Ubuntu and other Linux-based systems. It allows users to perform a wide range of administrative tasks without needing to use the WordPress web dashboard, offering a faster and more efficient way to manage websites. With WP-CLI, you can update plugins and themes, manage users, create and delete posts, configure settings, and even automate complex tasks, all directly from the terminal. This tool is particularly beneficial for developers and system administrators who manage multiple WordPress sites, as it streamlines many routine tasks and enables bulk operations, making WordPress management more efficient and scalable.
This tutorial will explain how to install WP-CLI and WordPress using WP-CLI and perform some basic tasks. The steps have been tested on Ubuntu 24.04.
Requirements
- A server running Ubuntu Linux.
- A root password is set up for your server.
Getting Started
Before starting, you must update your system with the latest version. You can do this by running the following command:
apt update -y
apt upgrade -y
Once your server is updated, restart your server to apply the changes.
Install LAMP Server
First, you will need to install Apache, MariaDB and PHP in your system. You can install all of them by running the following command:
apt-get install apache2 mariadb-server php php-cli php-common php-curl php-gd php-mbstring php-xml php-xmlrpc php-zip php-mysql -y
Once all the packages are installed, you can proceed with installing WP-CLI.
Install WP-CLI
The WP-CLI tool is available in .phar file. You can download it with the following command:
cd /tmp
wget https://raw.githubusercontent.com/wp-cli/builds/gh-pages/phar/wp-cli.phar
Once downloaded, move the downloaded file to /usr/bin directory:
mv wp-cli.phar /usr/bin/wpcli
Next, add executable permission to the wpcli file with the following command:
chmod +x /usr/bin/wpcli
Next, check the WP-CLI installation with the following command:
wpcli --info
If everything goes fine, you should get the following output:
Shell:	/bin/bash
PHP binary:	/usr/bin/php8.3
php.ini used:	/etc/php/8.3/cli/php.ini
WP-CLI root dir:	phar://wp-cli.phar/vendor/wp-cli/wp-cli
WP-CLI vendor dir:	phar://wp-cli.phar/vendor
WP_CLI phar path:	/root
WP-CLI packages dir:
WP-CLI global config:
WP-CLI project config:
WP-CLI version:	2.11.0
Activate Bash Completion
The bash completion is a feature of WP-CLI that allows you to list all available commands by pressing Tab.
To do so, you will need to download the bash script from the Git repository:
wget https://github.com/wp-cli/wp-cli/raw/master/utils/wp-completion.bash
Next, add the path of the bash script in .bashrc file so that wp-completion is loaded automatically.
nano .bashrc
Add the following line:
source /root/wp-completion.bash
Save and close the file, then reload the bash profile with the following command:
source ~/.bashrc
Now, you can test it by typing wpcli and pressing Tab twice. You should see the list of available commands with wp.
Install WordPress with WP-CLI
In this section, we will learn how to download and install WordPress with WP-CLI.
Create Database for WordPress
First, log in to MariaDB and create a database for WordPress:
mysql -u root -p
Provide your root password then create a database and user for WordPress with the following command:
MariaDB [(none)]> CREATE DATABASE wp;
MariaDB [(none)]> CREATE USER 'wpuser' IDENTIFIED BY 'password';
Next, grant all the privileges to the WordPress database with the following command:
MariaDB [(none)]> GRANT ALL PRIVILEGES ON wp.* TO 'wpuser';
Next, flush the privileges and exit from the MariaDB shell with the following command:
MariaDB [(none)]> FLUSH PRIVILEGES;
MariaDB [(none)]> EXIT;
Once you have done, you can proceed to the next step.
Downlaod and Install WordPress
First, change the directory to Apache web root and give proper permissions with the following command:
cd /var/www/html
chown -R www-data:www-data /var/www/html/
Next, download the WordPress source by running WP-CLI as a www-data user:
sudo -u www-data wp core download
You should see the following output:
md5 hash verified: aea5bb5e4fd51034f67c85e6d8bc6bbf
Success: WordPress downloaded.
Next, generate wp-config.php file with the following command:
sudo -u www-data wpcli core config --dbname='wp' --dbuser='wpuser' --dbpass='password' --dbhost='localhost' --dbprefix='wp_'
You should see the following output:
Success: Generated 'wp-config.php' file.
Don’t forget to replace wpuser and password with your WordPress database user and password.
Now, start the WordPress installation with the following command:
sudo -u www-data wpcli core install --url=' --title='My WordPress Blog' --admin_user='wpadmin' --admin_password='password' --admin_email='[email protected]'
Please, replace domain name, adminuser and password as per your need.
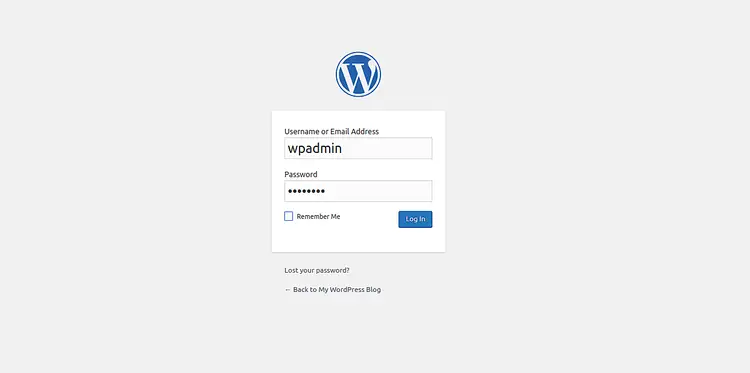
Now, open your web browser and type the URL You will be redirected to the WordPress login page as shown below:

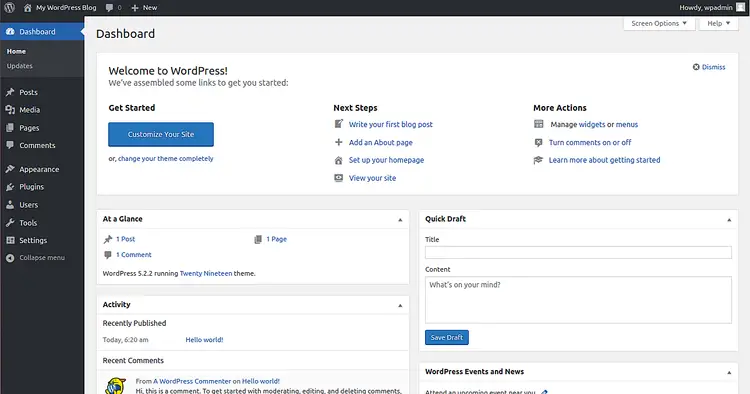
Provide your admin username and password, then click on the Log In button. You should see the WordPress dashboard in the following page:

Once you have done, you can proceed to the next step.
Install Themes and Plugins
You can install plugins and themes easily using the WP-CLI command line tool.
First, list all installed plugins with the following command:
sudo -u www-data wpcli plugin list
Output:
+---------+----------+--------+---------+
| name    | status   | update | version |
+---------+----------+--------+---------+
| akismet | inactive | none   | 4.1.2   |
| hello   | inactive | none   | 1.7.2   |
+---------+----------+--------+---------+
You can also list all installed themes with the following command:
sudo -u www-data wpcli theme list
Output:
+-----------------+----------+--------+---------+
| name            | status   | update | version |
+-----------------+----------+--------+---------+
| twentynineteen  | active   | none   | 1.4     |
| twentyseventeen | inactive | none   | 2.2     |
| twentysixteen   | inactive | none   | 2.0     |
+-----------------+----------+--------+---------+
Now, search and install “WP Super Cache” plugin with the following command:
sudo -u www-data wpcli plugin search "WP Super Cache"
Output:
Success: Showing 10 of 508 plugins.
+------------------------------------------------------------------+--------------------------------------+--------+
| name                                                             | slug                                 | rating |
+------------------------------------------------------------------+--------------------------------------+--------+
| WP Super Cache                                                   | wp-super-cache                       | 86     |
| Autoptimize                                                      | autoptimize                          | 94     |
| WP Fastest Cache                                                 | wp-fastest-cache                     | 96     |
| WP-Optimize – Clean, Compress, Cache.                      | wp-optimize                          | 98     |
| WP Super Cache – Clear all cache                           | wp-super-cache-clear-cache-menu      | 66     |
| WPS Hide Login                                                   | wps-hide-login                       | 98     |
| Cerber Security, Antispam & Malware Scan                     | wp-cerber                            | 98     |
| Minimal Coming Soon & Maintenance Mode – Coming Soon Builder | minimal-coming-soon-maintenance-mode | 96     |
| Hummingbird – Speed up, Cache, Optimize Your CSS and JS          | hummingbird-performance              | 96     |
| CAOS | Host Google Analytics Locally                             | host-analyticsjs-local               | 96     |
+------------------------------------------------------------------+--------------------------------------+--------+
Now, install and activate wp-super-cache plugin with the following command:
sudo -u www-data wpcli plugin install wp-super-cache
sudo -u www-data wpcli plugin activate wp-super-cache
You should see the following output:
Plugin 'wp-super-cache' activated.
Success: Activated 1 of 1 plugins.
Next, install and activate islemag theme with the following command:
sudo -u www-data wpcli theme install islemag
sudo -u www-data wpcli theme activate islemag
Update WordPress and Plugins
If you want to update specific WordPress plugin, run the following command:
sudo -u www-data wpcli plugin update wp-super-cache
If you want to update your WordPress, run the following commands:
sudo -u www-data wpcli core update
sudo -u www-data wpcli core update-db
WP-CLI Basic Command
To check the version of your WordPress, run the following command:
sudo -u www-data wpcli core version
You should see the following output:
5.2.2
To check if any update is available for WordPress, run the following command:
sudo -u www-data wpcli core check-update
To clear WordPress cache, run the following command:
sudo -u www-data wpcli cache flush
To update all plugins, run the following command:
sudo -u www-data wpcli plugin update --all
To deactivate all plugins, run the following command:
sudo -u www-data wpcli plugin deactivate --all
You can also see the list of commands available with WP-CLI using the following command:
sudo -u www-data wpcli --help
You should see the following output:
NAME wp DESCRIPTION Manage WordPress through the command-line. SYNOPSIS wpSUBCOMMANDS cache Adds, removes, fetches, and flushes the WP Object Cache object. cap Adds, removes, and lists capabilities of a user role. cli Review current WP-CLI info, check for updates, or see defined aliases. comment Creates, updates, deletes, and moderates comments. config Generates and reads the wp-config.php file. core Downloads, installs, updates, and manages a WordPress installation. cron Tests, runs, and deletes WP-Cron events; manages WP-Cron schedules. db Performs basic database operations using credentials stored in wp-config.php. embed Inspects oEmbed providers, clears embed cache, and more. eval Executes arbitrary PHP code. eval-file Loads and executes a PHP file. export Exports WordPress content to a WXR file. help Get help on WP-CLI, or on a specific command. i18n Provides internationalization tools for WordPress projects. import Imports content from a given WXR file. language Installs, activates, and manages language packs. maintenance-mode Activates, deactivates or checks the status of the maintenance mode of a site. media Imports files as attachments, regenerates thumbnails, or lists registered image sizes. menu Lists, creates, assigns, and deletes the active theme's navigation menus. network Perform network-wide operations. option Retrieves and sets site options, including plugin and WordPress settings. package Lists, installs, and removes WP-CLI packages. plugin Manages plugins, including installs, activations, and updates. post Manages posts, content, and meta.
Conclusion
The above tutorial taught you how to install WP-CLI on a Debian server. You have also learned how to use WP-CLI to install and manage WordPress, Plugins and themes. For more information about WP-CLI command, visit the WP-CLI documentation at WP-CLI.


